用Tomcat搭建HTTPS网页
本文共 6970 字,大约阅读时间需要 23 分钟。
用Tomcat搭建HTTPS
实验环境:centos7、tomcat7.0.56版本、关闭防火墙
部署tomcat
- 将下载好的压缩包上传到服务器上(我这边已经上传好并且,tar解压好了)
[root@qmfz qmfz]# ll总用量 189856drwxr-xr-x. 10 root root 171 12月 31 08:22 apache-tomcat-7.0.56-rw-r--r--. 1 root root 8894241 12月 30 14:04 apache-tomcat-7.0.56.tar.gzdrwxr-xr-x. 8 10 143 255 7月 22 2017 jdk1.8.0_144-rw-r--r--. 1 root root 185515842 12月 30 14:13 jdk-8u144-linux-x64.tar.gz
- 查看环境
[root@qmfz qmfz]# cd apache-tomcat-7.0.56[root@qmfz apache-tomcat-7.0.56]# ll总用量 100drwxr-xr-x. 2 root root 4096 12月 30 14:21 bin #放命令,开机/关机drwxr-xr-x. 3 root root 229 12月 31 09:55 conf #放配置文件drwxr-xr-x. 2 root root 4096 12月 30 14:05 lib-rw-r--r--. 1 root root 56812 9月 26 2014 LICENSEdrwxr-xr-x. 2 root root 4096 12月 31 08:32 logs-rw-r--r--. 1 root root 1192 9月 26 2014 NOTICE-rw-r--r--. 1 root root 8963 9月 26 2014 RELEASE-NOTES-rw-r--r--. 1 root root 16204 9月 26 2014 RUNNING.txtdrwxr-xr-x. 2 root root 61 12月 31 08:23 ssl drwxr-xr-x. 2 root root 30 12月 30 14:05 tempdrwxr-xr-x. 8 root root 107 12月 30 14:21 webapps #放网页内容drwxr-xr-x. 3 root root 22 12月 30 14:21 work
部署jdk
- 从上可得,我们也是把下载好得压缩包上传到服务器上,从而解压使用。
[root@qmfz qmfz]# cd jdk1.8.0_144[root@qmfz jdk1.8.0_144]# ll总用量 25828drwxr-xr-x. 2 10 143 4096 7月 22 2017 bin #提供 JDK 工具程序-r--r--r--. 1 10 143 3244 7月 22 2017 COPYRIGHTdrwxr-xr-x. 4 10 143 122 7月 22 2017 dbdrwxr-xr-x. 3 10 143 132 7月 22 2017 include #存放用于本地访问的文件-rwxr-xr-x. 1 10 143 5097973 6月 27 2017 javafx-src.zipdrwxr-xr-x. 5 10 143 185 7月 22 2017 jre #存放 Java 运行环境文件drwxr-xr-x. 5 10 143 245 7月 22 2017 lib #存放 Java 的类库文件-r--r--r--. 1 10 143 40 7月 22 2017 LICENSEdrwxr-xr-x. 4 10 143 47 7月 22 2017 man-r--r--r--. 1 10 143 159 7月 22 2017 README.html-rw-r--r--. 1 10 143 526 7月 22 2017 release-rw-r--r--. 1 10 143 21111510 7月 22 2017 src.zip-rwxr-xr-x. 1 10 143 63933 6月 27 2017 THIRDPARTYLICENSEREADME-JAVAFX.txt-r--r--r--. 1 10 143 145180 7月 22 2017 THIRDPARTYLICENSEREADME.txt
配置JDK全局环境变量
[root@VM-0-7-centos jdk1.8.0_144]# vi /etc/profile (打开文件,在文末加上两句)# /etc/profile# System wide environment and startup programs, for login setup# Functions and aliases go in /etc/bashrc# It's NOT a good idea to change this file unless you know what you# are doing. It's much better to create a custom.sh shell script in# /etc/profile.d/ to make custom changes to your environment, as this# will prevent the need for merging in future updates.pathmunge () { case ":${PATH}:" in *:"$1":*) ;; *) if [ "$2" = "after" ] ; then PATH=$PATH:$1 else PATH=$1:$PATH ......export JAVA_HOME=/home/tomcat/jdk1.8.0_144export PATH=$PATH:$JAVA_HOME/bin 重新加载配置文件
[root@VM-0-7-centos jdk1.8.0_144]# source /etc/profile
检查JDK是否安装成功
[root@VM-0-7-centos jdk1.8.0_144]# java -versionjava version "1.8.0_144" #看到版本号就已经安装好Java(TM) SE Runtime Environment (build 1.8.0_144-b01)Java HotSpot(TM) 64-Bit Server VM (build 25.144-b01, mixed mode)
做好后启动tomcat
[root@qmfz apache-tomcat-7.0.56]# cd bin[root@qmfz bin]# ll总用量 864-rw-r--r--. 1 root root 28051 9月 26 2014 bootstrap.jar-rw-r--r--. 1 root root 30989 12月 31 15:43 cas.log-rw-r--r--. 1 root root 13007 9月 26 2014 catalina.bat-rwxr-xr-x. 1 root root 20779 9月 26 2014 catalina.sh-rw-r--r--. 1 root root 2121 9月 26 2014 catalina-tasks.xml-rw-r--r--. 1 root root 24283 9月 26 2014 commons-daemon.jar-rw-r--r--. 1 root root 204944 9月 26 2014 commons-daemon-native.tar.gz-rw-r--r--. 1 root root 2040 9月 26 2014 configtest.bat-rwxr-xr-x. 1 root root 1922 9月 26 2014 configtest.sh-rwxr-xr-x. 1 root root 7888 9月 26 2014 daemon.sh-rw-r--r--. 1 root root 2091 9月 26 2014 digest.bat-rwxr-xr-x. 1 root root 1965 9月 26 2014 digest.sh-rw-r--r--. 1 root root 43542 12月 31 15:44 perfStats.log-rw-r--r--. 1 root root 3430 9月 26 2014 setclasspath.bat-rwxr-xr-x. 1 root root 3547 9月 26 2014 setclasspath.sh-rw-r--r--. 1 root root 2020 9月 26 2014 shutdown.bat-rwxr-xr-x. 1 root root 1902 9月 26 2014 shutdown.sh-rw-r--r--. 1 root root 2022 9月 26 2014 startup.bat-rwxr-xr-x. 1 root root 1904 9月 26 2014 startup.sh-rw-r--r--. 1 root root 38195 9月 26 2014 tomcat-juli.jar-rw-r--r--. 1 root root 387417 9月 26 2014 tomcat-native.tar.gz-rw-r--r--. 1 root root 4021 9月 26 2014 tool-wrapper.bat-rwxr-xr-x. 1 root root 5024 9月 26 2014 tool-wrapper.sh-rw-r--r--. 1 root root 2026 9月 26 2014 version.bat-rwxr-xr-x. 1 root root 1908 9月 26 2014 version.sh[root@qmfz bin]# ./startup.shUsing CATALINA_BASE: /home/qmfz/apache-tomcat-7.0.56Using CATALINA_HOME: /home/qmfz/apache-tomcat-7.0.56Using CATALINA_TMPDIR: /home/qmfz/apache-tomcat-7.0.56/tempUsing JRE_HOME: /home/qmfz/jdk1.8.0_144Using CLASSPATH: /home/qmfz/apache-tomcat-7.0.56/bin/bootstrap.jar:/home/qmfz/apache-tomcat-7.0.56/bin/tomcat-juli.jarTomcat started.[root@qmfz bin]# pwd/home/qmfz/apache-tomcat-7.0.56/bin #开启的路径,对应自己的配置[root@qmfz bin]#
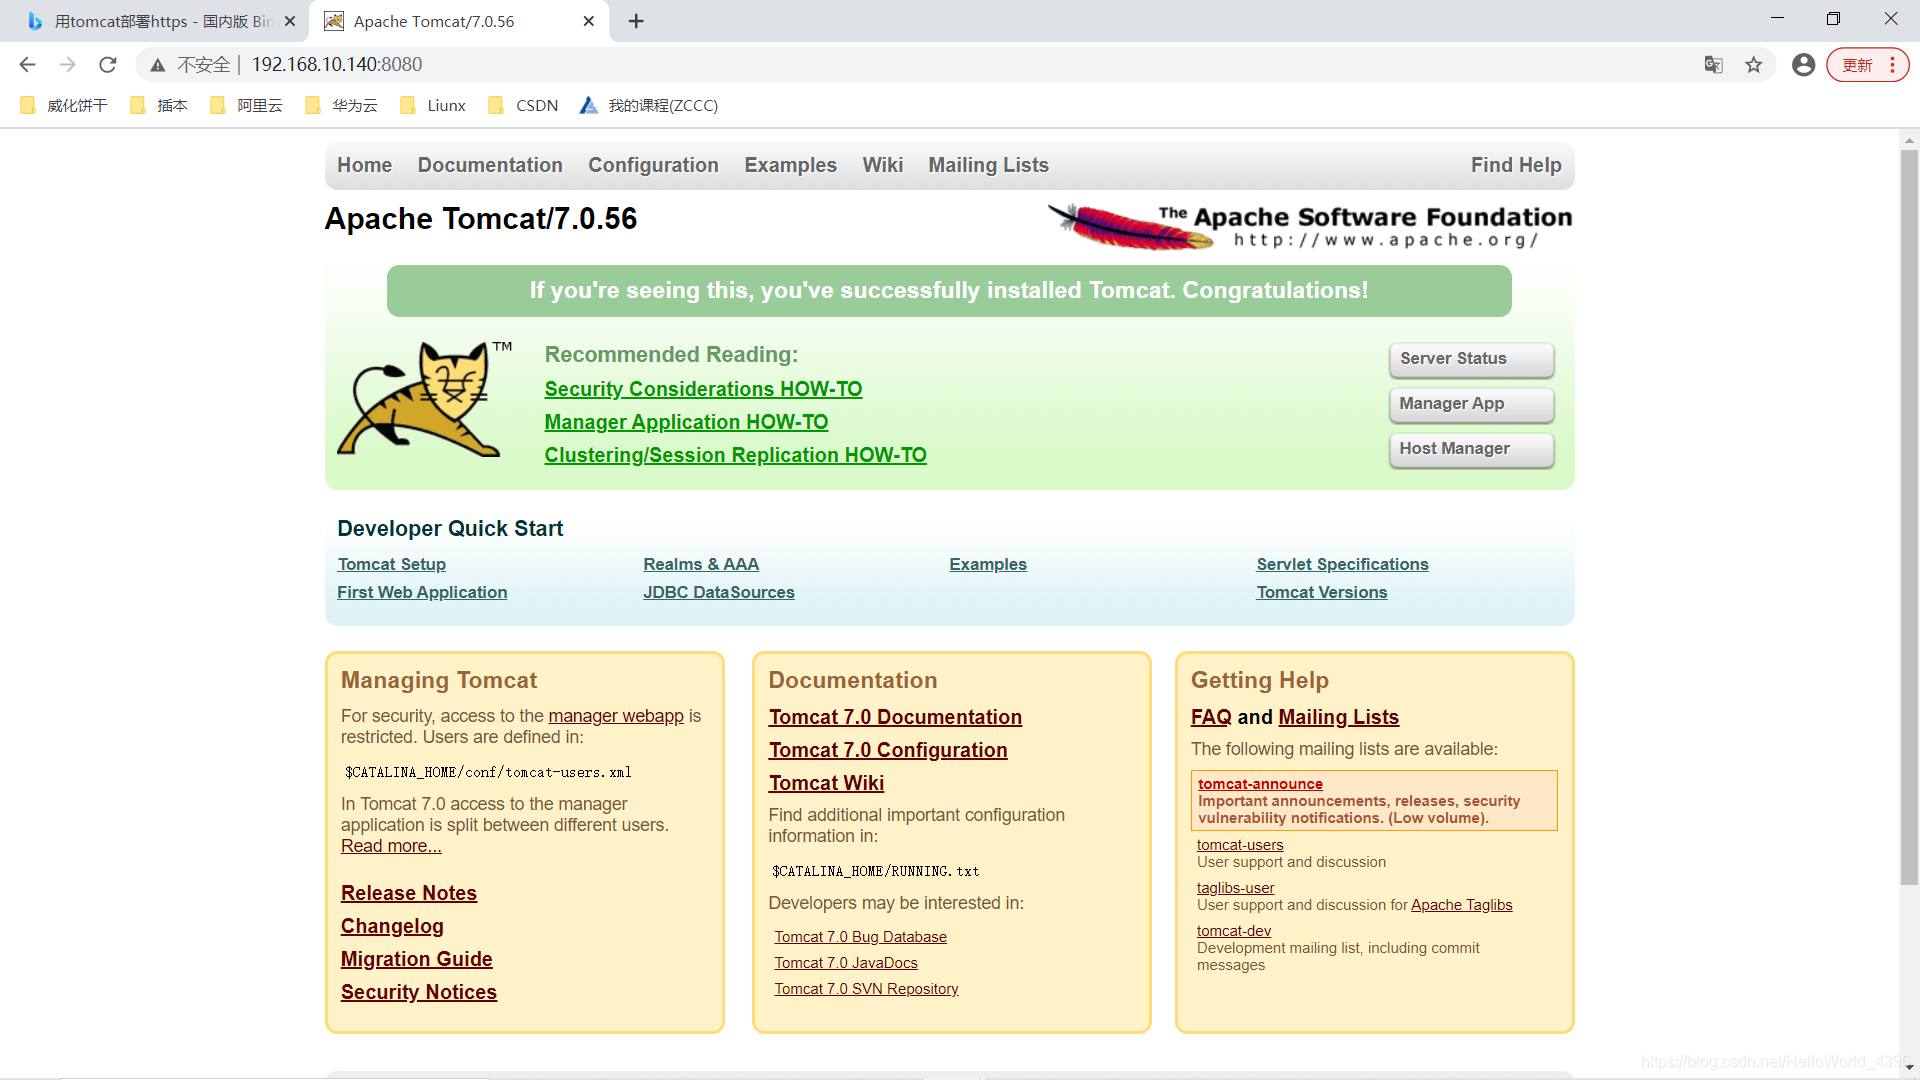
使用ip地址加8080端口,用浏览器访问

[root@qmfz apache-tomcat-7.0.56]# cd webapps[root@qmfz webapps]# ll总用量 24464drwxr-xr-x. 7 root root 108 12月 30 14:21 cas #一个war包-rw-r--r--. 1 root root 25038970 12月 30 14:08 cas.wardrwxr-xr-x. 14 root root 4096 12月 30 14:05 docsdrwxr-xr-x. 7 root root 111 12月 30 14:05 examplesdrwxr-xr-x. 5 root root 87 12月 30 14:05 host-managerdrwxr-xr-x. 5 root root 103 12月 30 14:05 managerdrwxr-xr-x. 3 root root 4096 12月 30 14:05 ROOT
我们现在来访问,看看能否访问到我们的网页。

但是,我们今天要部署的是https网页,众所周知,搭建https网页需要一个ssl证书。
ps:申请证书需要域名,申请时注意域名解析(在域名解析指定主机)。
我这边已经下载好需要的证书

 我们需要把证书上传到我们的服务器上
 [root@qmfz apache-tomcat-7.0.56]# cd conf #我是上传到conf目录下[root@qmfz conf]# ll总用量 216drwxr-xr-x. 4 root root 49 12月 31 09:36 Catalina-rw-------. 1 root root 12257 9月 26 2014 catalina.policy-rw-------. 1 root root 6294 9月 26 2014 catalina.properties-rw-r--r--. 1 root root 6064 12月 31 08:25 chenshuyi.biuayi.cn.jks-rw-------. 1 root root 1394 9月 26 2014 context.xml-rw-r--r--. 1 root root 14 12月 31 08:25 keystorePass.txt-rw-------. 1 root root 3288 9月 26 2014 logging.properties-rw-------. 1 root root 6646 12月 31 09:35 server.xml-rw-------. 1 root root 1530 9月 26 2014 tomcat-users.xml-rw-------. 1 root root 163915 12月 31 09:55 web.xml
完成后我们还需要修改配置文件
(按照下面配置修改)[root@qmfz conf]# vim server.xml
接着修改web.xml文件
#在文件末尾加上:CLIENT-CERT Client Cert Users-only Area SSL /* CONFIDENTIAL
域名解析(看情况做)
[root@qmfz ~]# vim /etc/hosts127.0.0.1 localhost localhost.localdomain localhost4 localhost4.localdomain4::1 localhost localhost.localdomain localhost6 localhost6.localdomain6192.168.10.140 chenshuyi.biuayi.cn #服务器地址加域名~


转载地址:http://rikiz.baihongyu.com/
你可能感兴趣的文章
NISP一级,NISP二级报考说明,零基础入门到精通,收藏这篇就够了
查看>>
NISP国家信息安全水平考试,收藏这一篇就够了
查看>>
NIS服务器的配置过程
查看>>
NIS认证管理域中的用户
查看>>
Nitrux 3.8 发布!性能全面提升,带来非凡体验
查看>>
NiuShop开源商城系统 SQL注入漏洞复现
查看>>
NI笔试——大数加法
查看>>
NLog 自定义字段 写入 oracle
查看>>
NLog类库使用探索——详解配置
查看>>
NLP 基于kashgari和BERT实现中文命名实体识别(NER)
查看>>
NLP 模型中的偏差和公平性检测
查看>>
Vue3.0 性能提升主要是通过哪几方面体现的?
查看>>
NLP 项目:维基百科文章爬虫和分类【01】 - 语料库阅读器
查看>>
NLP_什么是统计语言模型_条件概率的链式法则_n元统计语言模型_马尔科夫链_数据稀疏(出现了词库中没有的词)_统计语言模型的平滑策略---人工智能工作笔记0035
查看>>
NLP三大特征抽取器:CNN、RNN与Transformer全面解析
查看>>
NLP学习笔记:使用 Python 进行NLTK
查看>>
NLP度量指标BELU真的完美么?
查看>>
NLP的不同研究领域和最新发展的概述
查看>>
NLP的神经网络训练的新模式
查看>>
NLP采用Bert进行简单文本情感分类
查看>>